How to Read a Coastal Path Through Its Landmarks
Plan a coastal walk around clear landmarks, choose a sensible turn-back point, and notice how paths, shore access, and views shape the route.
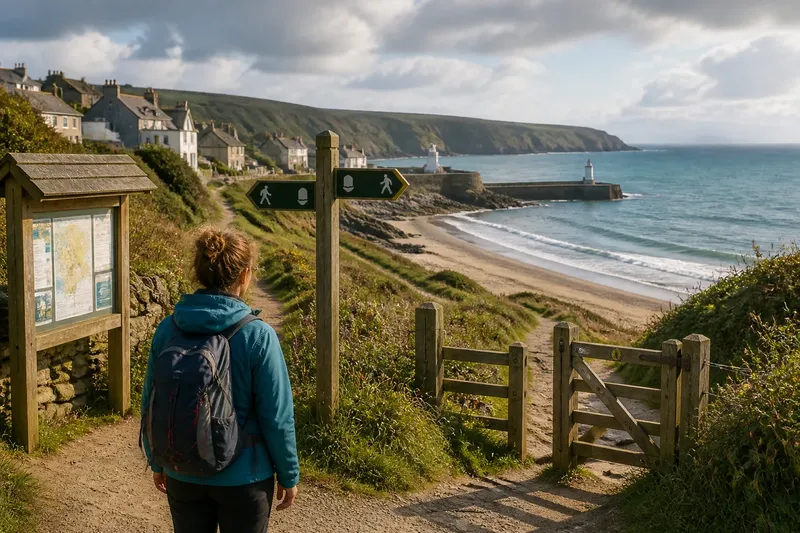
A coastal walk becomes easier to manage when its route is tied to visible landmarks, not a string of shoreline details. On an unfamiliar coast, a signed path junction, a beach access gate, and a distinctive bend can help you understand where you are and how to return.
Imagine arriving in the fictional village of Greyhaven with an hour before lunch. You want a walk with a clear route, not an open-ended wander along the water. The village noticeboard, the signed coastal path, and a broad beach access provide a simple sequence of places to follow and check against the way back.
How do landmarks make a coastal walk easier?
Landmarks turn a route into a set of visible decisions. A path sign tells you where the public route continues; a gate or access ramp marks where you can leave it; a headland or harbor entrance helps orient you from a distance.
Choose landmarks that are easy to identify from the route itself. A distinctive building, a large path junction, or a marked viewpoint is more useful than a small object that could be hidden by vegetation or confused with something similar. A map can confirm the route, but a landmark helps you match the map to the ground.
At Greyhaven, the walker notes three points before setting out: the noticeboard, the signed turn towards the beach, and the access gate. These are route references, not targets to reach at any cost. If the path is closed or the gate leads to unsuitable ground, the walker stays on the marked path and turns back from a clear point.
How should you choose the route and turning point?
Start with public access and the return route. Check a local map or a reliable walking app for the path, access points, and any closure notices. Read signs at the site, since a mapped line does not mean every section is open or suitable under current conditions.
Set a turn-back point before leaving the village. Choose a place that is easy to recognise from the route, such as a signed junction or a viewpoint before a narrowing section. Avoid making the turning point depend on reaching a headland, crossing a beach, or passing through a place where the route may become difficult to retrace.
Use this quick decision list before you go:
- Check the access sign: If it marks the route as open, follow the signed path; if it shows a closure or restriction, choose another public route.
- Check the map against visible path junctions: If the marked route matches the signs on the ground, continue; if it does not, stop and use local signage or turn back rather than guessing.
- Check that the return route is identifiable: If you can name the access point or junction you will return to, start; if not, choose a shorter route with clearer landmarks.
- Check the shore access before leaving the path: If the access is open and the conditions look suitable, use it; if the way is blocked, unstable, or exposed, stay on the path.
- Check whether the planned turn-back point is visible or signposted: If it is, use it as the limit; if it is not, choose a clearer point closer to the start.
- Check the path surface and your footwear: If the surface suits your footwear and ability, continue; if it is slippery or uneven beyond your comfort, return by the route you know.
- Check local guidance for dogs or children: If the route rules and conditions suit your group, follow them; if not, choose a more appropriate path or leave the animal at home.
Keep the plan flexible. Tide conditions, weather, local restrictions, and the needs of anyone walking with you can make a route unsuitable. Follow local safety advice, and ask a qualified professional or local authority when you need specific guidance.
What should you notice between landmarks?
Landmarks establish direction; the route between them gives the walk its texture. Notice how the path changes near a beach access, whether a viewpoint opens onto a harbor or a broad strand, and where the coastal path rises away from the water.
These observations help you understand the route without requiring you to leave it. A path may pass behind a seawall, climb above a rocky cove, or follow the edge of a village before reaching open ground. Each change tells you something practical about access and orientation.
Say you reach a signed junction where one branch continues above the shore and another descends to a beach gate. If the gate is open and the shore looks suitable, you can take the short access route and return to the same junction. If the gate is closed or the ground beyond looks unstable, remain on the higher path; you still have a coherent walk and an obvious way back.
How can you make the route manageable?
Use a map or route app before setting out to check public access and identify the main junctions. Save the route if your app supports offline access, but do not rely on a phone signal or battery as your only way to find the start again. A paper map is a useful alternative where digital coverage is uncertain.
Keep your attention on the path when walking, especially near steps, loose surfaces, or exposed edges. Stop in a safe place if you need to check the map. Follow posted instructions, avoid closed sections, and do not cross barriers to reach a landmark.
For a short outing, the route can be as simple as the village noticeboard to the beach access, then back along the signed path. The point is not to collect landmarks. It is to use a few clear references so you can make ordinary route decisions without drifting into an uncertain section.
What questions do walkers ask about coastal routes?
Should I follow a coastal path or walk on the beach?
Follow the signed path when beach access is closed, unclear, or unsuitable for the conditions. Use the beach only where access is permitted and local guidance supports it.
How do I know where to turn back?
Choose a recognisable junction, viewpoint, or access point before you start, then turn back there rather than pressing on toward an uncertain section. If conditions change, turn back sooner.
Can I rely on a walking app?
An app can help you check the route and locate public access, but signs and local instructions take precedence on the ground. Carry a paper map or another way to identify your return route if phone access may be unreliable.
What if the marked route is closed?
Do not cross a barrier or assume a closure can be bypassed safely. Follow a signed alternative if one is available; otherwise, return to the last clear junction and choose another route.
What does the return walk tell you?
On the way back, use the landmarks in reverse: beach access, path junction, village noticeboard. This confirms that the outward route remains easy to retrace and helps you spot any change in access or conditions.
At Greyhaven, the walker returns to the noticeboard by the signed path, having stopped at the planned junction rather than continuing towards the headland. The route is complete because the start, turn, and return points are clear—not because every view has been reached.
When planning a coastal walk, treat landmarks as practical references rather than promises about what lies ahead. A visible access point and a clear route back are more useful than a distant destination that depends on conditions you cannot confirm from the path.